

Local Development
Introduction
Section titled “Introduction”This guide walks you through starting the Snowflake emulator, connecting the Snowflake CLI, and running your first SQL query. You will perform the entire workflow on your local machine without a Snowflake account or consuming Snowflake credits.
A successful walkthrough results in:
- A running emulator: A local, Snowflake-compatible endpoint.
- A Snowflake CLI connection: A
localstackconnection profile pointed at your local emulator. - Sample data: A database, schema, and table populated with sample records via a CSV upload.
Prerequisites
Section titled “Prerequisites”- Docker engine installed and running.
- A LocalStack account and a valid LocalStack Auth Token.
- Snowflake CLI (
snow) installed.
If you haven’t installed LocalStack yet, follow the installation guide to get started.
Step 1: Install and start the Snowflake emulator
Section titled “Step 1: Install and start the Snowflake emulator”Start the Snowflake emulator:
lstk start --type snowflakeThe first run triggers a browser-based authentication flow. After authentication, lstk pulls the LocalStack for Snowflake image and initializes the container, then prints a confirmation banner once the emulator is ready.
Step 2: Connect the Snowflake CLI
Section titled “Step 2: Connect the Snowflake CLI”Create a connection profile that points the Snowflake CLI at your local emulator:
snow connection add \ --connection-name localstack \ --user test \ --password test \ --account test \ --host snowflake.localhost.localstack.cloudYou might be prompted for additional optional parameters, such as the connection port, database name, or warehouse name. These can be skipped.
Test the connection:
snow connection test --connection localstack+--------------------------------------------------------+| key | value ||-----------------+--------------------------------------|| Connection name | localstack || Status | OK || Host | snowflake.localhost.localstack.cloud || Account | test || User | test |+--------------------------------------------------------+A Status of OK confirms the Snowflake CLI can reach your local emulator.
Step 3: Run your first query
Section titled “Step 3: Run your first query”Open an interactive SQL session using the localstack connection profile:
snow sql --connection localstackIn this session, we’ll create a student records database that demonstrates how to create databases, schemas, and tables, upload data using a stage, and query the results.
Create the database and use it:
CREATE DATABASE IF NOT EXISTS STUDENT_RECORDS_DEMO;USE DATABASE STUDENT_RECORDS_DEMO;+-----------------------------------------------------+| status ||-----------------------------------------------------|| Database STUDENT_RECORDS_DEMO successfully created. |+-----------------------------------------------------+Create a schema and use it:
CREATE SCHEMA IF NOT EXISTS PUBLIC;USE SCHEMA PUBLIC;Create the STUDENT_DATA table:
CREATE OR REPLACE TABLE STUDENT_DATA ( student_id VARCHAR(50), first_name VARCHAR(100), last_name VARCHAR(100), email VARCHAR(200), enrollment_date DATE, gpa FLOAT, major VARCHAR(100));+------------------------------------------+| status ||------------------------------------------|| Table STUDENT_DATA successfully created. |+------------------------------------------+Create a file format and a stage for uploading files:
CREATE OR REPLACE FILE FORMAT csv_format    TYPE = CSV    FIELD_DELIMITER = ','    SKIP_HEADER = 1    NULL_IF = ('NULL', 'null')    EMPTY_FIELD_AS_NULL = TRUE;
CREATE OR REPLACE STAGE student_data_stage    FILE_FORMAT = csv_format;
Exit the SQL session (!exit or Ctrl+D), and create a student_data.csv file with sample records:
student_id,first_name,last_name,email,enrollment_date,gpa,majorS001,John,Smith,john.smith@university.edu,2023-08-15,3.75,Computer ScienceS002,Alice,Johnson,alice.johnson@university.edu,2023-08-15,3.92,MathematicsS003,Bob,Williams,bob.williams@university.edu,2022-08-15,3.45,EngineeringS004,Carol,Brown,carol.brown@university.edu,2024-01-10,3.88,PhysicsS005,David,Davis,david.davis@university.edu,2023-08-15,2.95,BiologyUpload the CSV file to the stage:
snow sql --connection localstack \ --query "PUT file://student_data.csv @student_data_stage AUTO_COMPRESS=TRUE;"source |target |source_size|target_size|source_compression|target_compression|status |message|----------------+-------------------+-----------+-----------+------------------+------------------+--------+-------+student_data.csv|student_data.csv.gz| 425| 262|NONE |GZIP |UPLOADED| |Load the data from the stage into the table, then query it:
snow sql --connection localstack --query "COPY INTO STUDENT_DATA FROM @student_data_stage ON_ERROR = 'CONTINUE';SELECT COUNT(*) AS total_students FROM STUDENT_DATA;"+----------------+| TOTAL_STUDENTS ||----------------|| 5 |+----------------+The Snowflake CLI executed every statement against the locally emulated Snowflake instance. Because no actual Snowflake resources are created, you won’t consume any real Snowflake credits.
Step 4: Inspect resources
Section titled “Step 4: Inspect resources”View the state of your local database via the LocalStack Web Application. Navigate to the Snowflake tab to inspect your running resources using the SQL Worksheet, which provides syntax highlighting, autocomplete, and a resource tree for your databases, schemas, and tables.
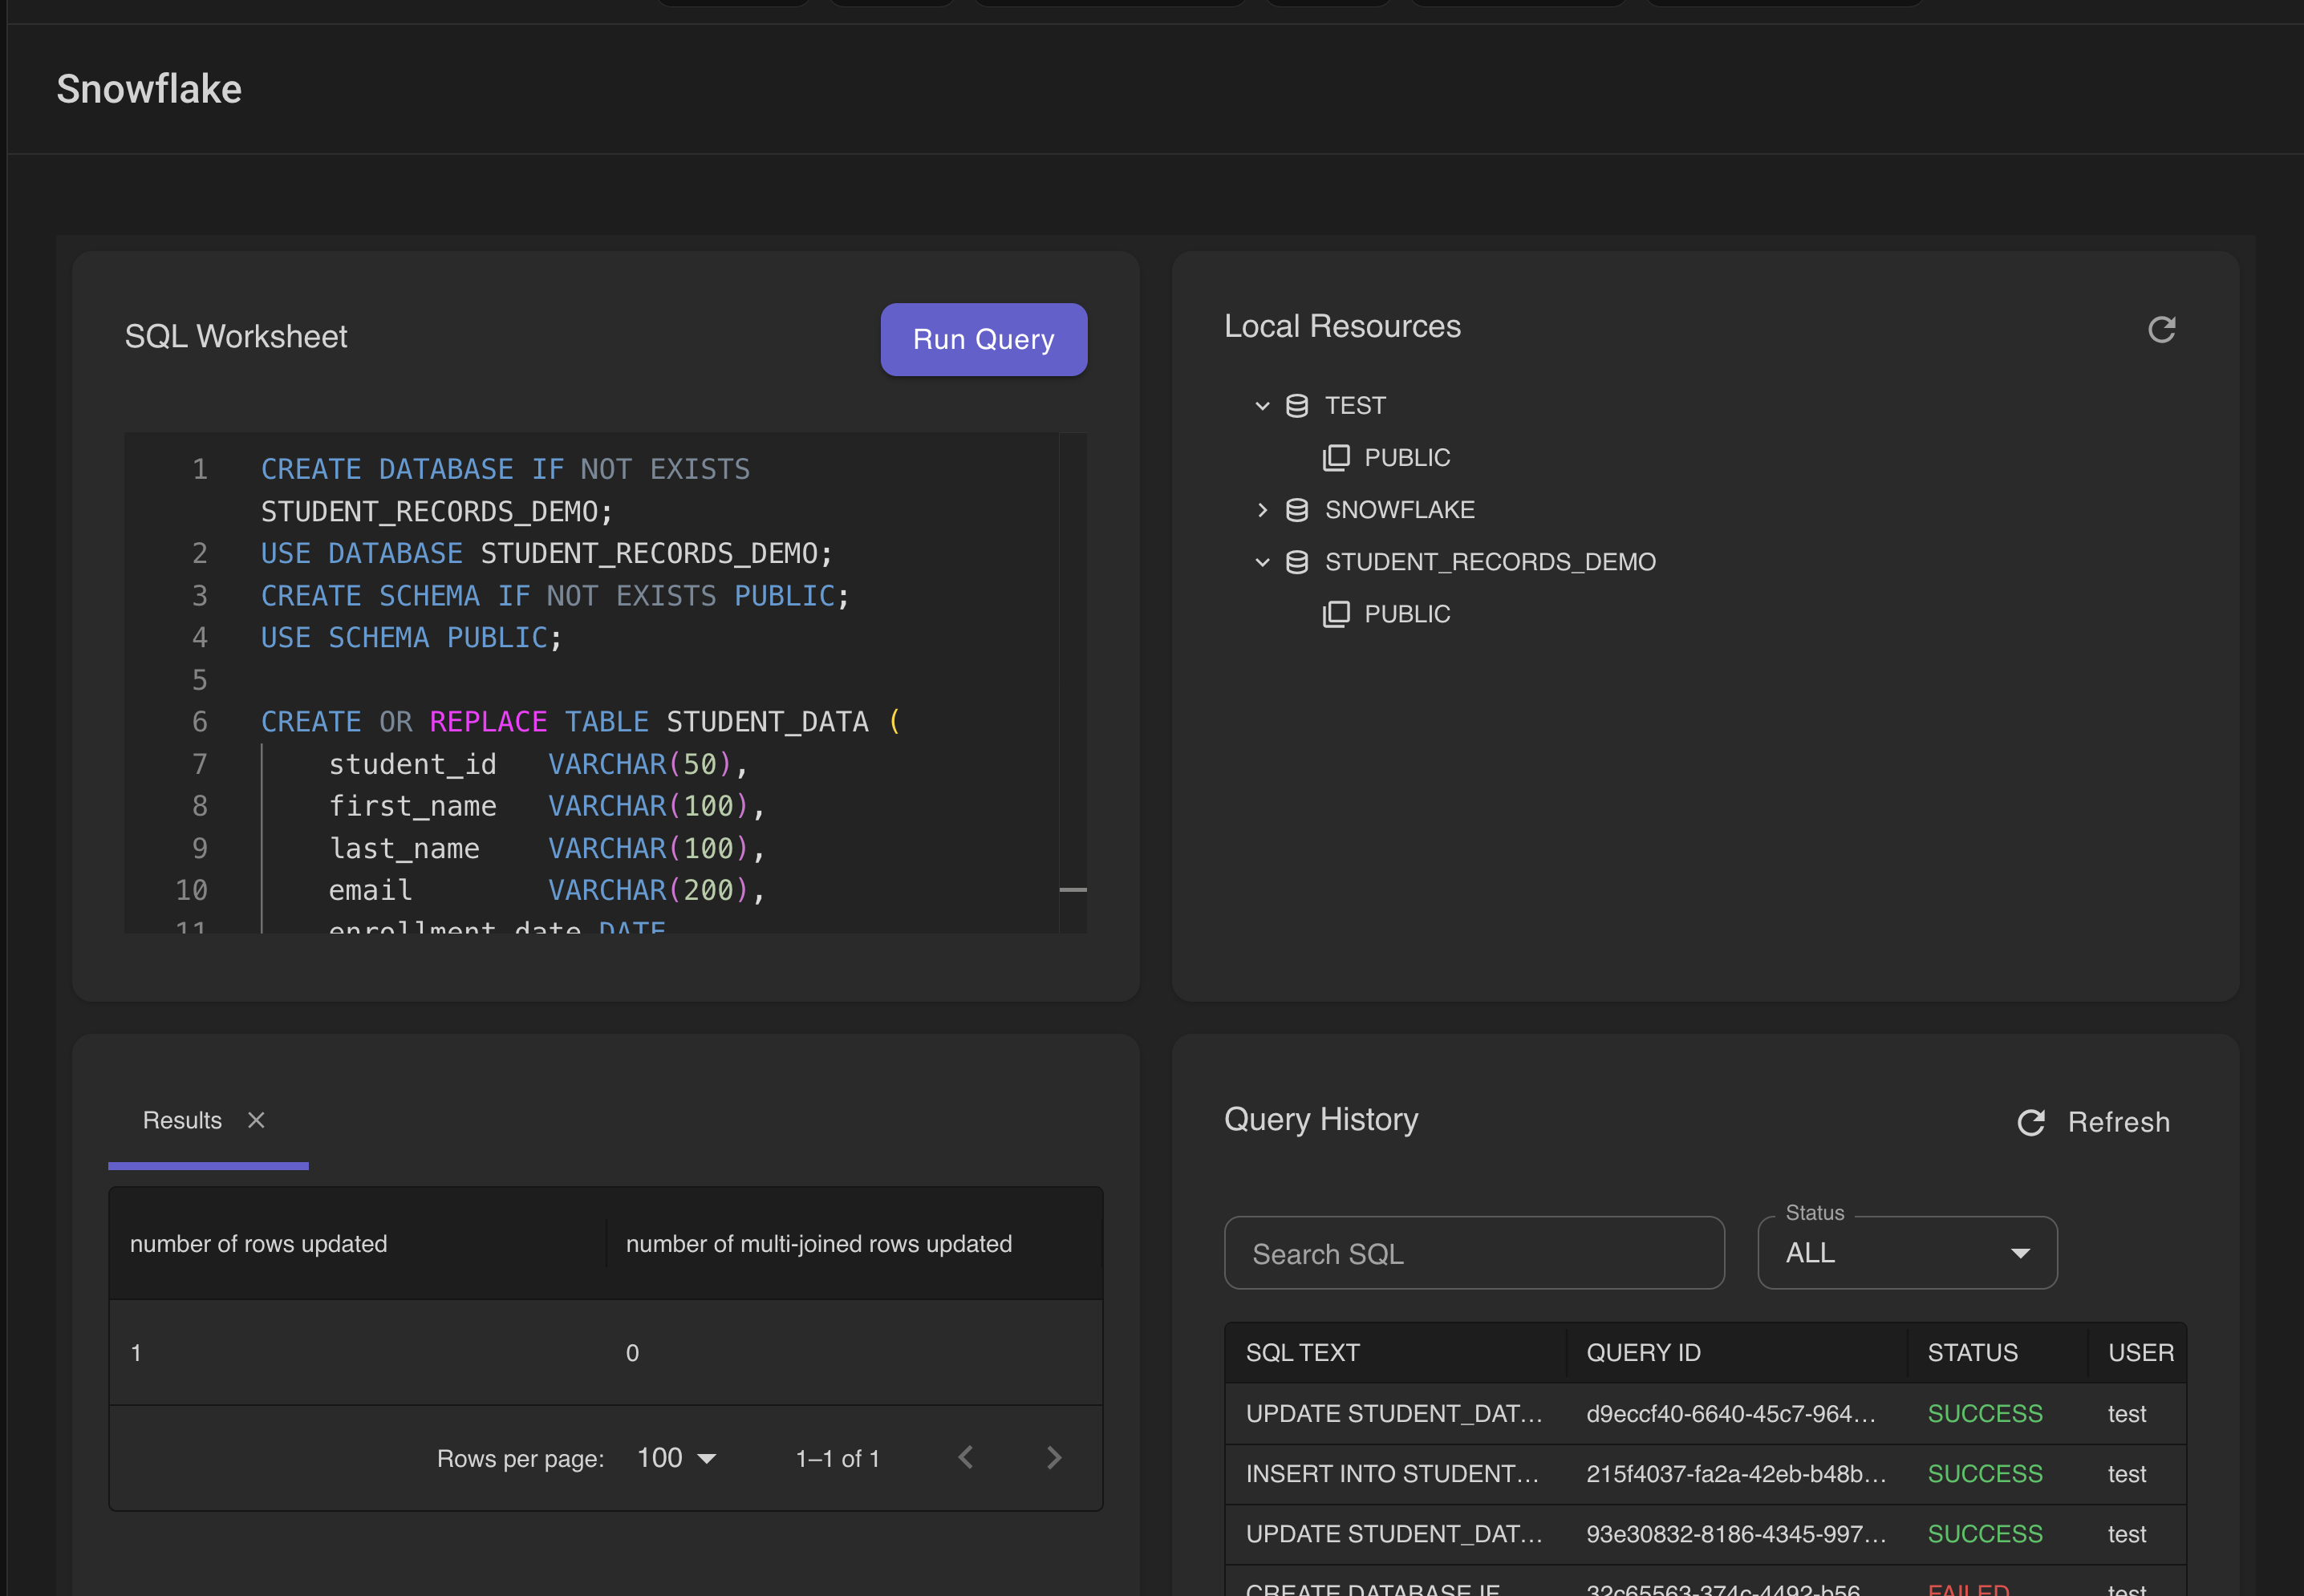
For more on the Web Application’s Snowflake tooling, see User Interface.
Step 5: Clean up
Section titled “Step 5: Clean up”Stop your LocalStack container to remove all emulated resources. LocalStack is ephemeral by default; stopping the instance clears the state.
lstk stopTo persist your database, schema, and table data across restarts, see State Management.
Remove the local file you created in this guide:
rm student_data.csvExplore more
Section titled “Explore more”- Load data from cloud storage: Use Storage Integrations (currently supporting AWS S3) or a script (see Snowflake Drivers).
- Automate data ingestion: Configure Snowpipe for automated data ingestion from external sources.
- Use your favorite tools: Continue developing against LocalStack for Snowflake with your preferred integrations.
Next steps
Section titled “Next steps”You have successfully connected the Snowflake CLI and run your first query against a local Snowflake-compatible emulator. Proceed to the CI/CD guide to learn how to integrate LocalStack for Snowflake into your automated continuous integration pipelines.